> #ros2-foxy #gazebo-simulator
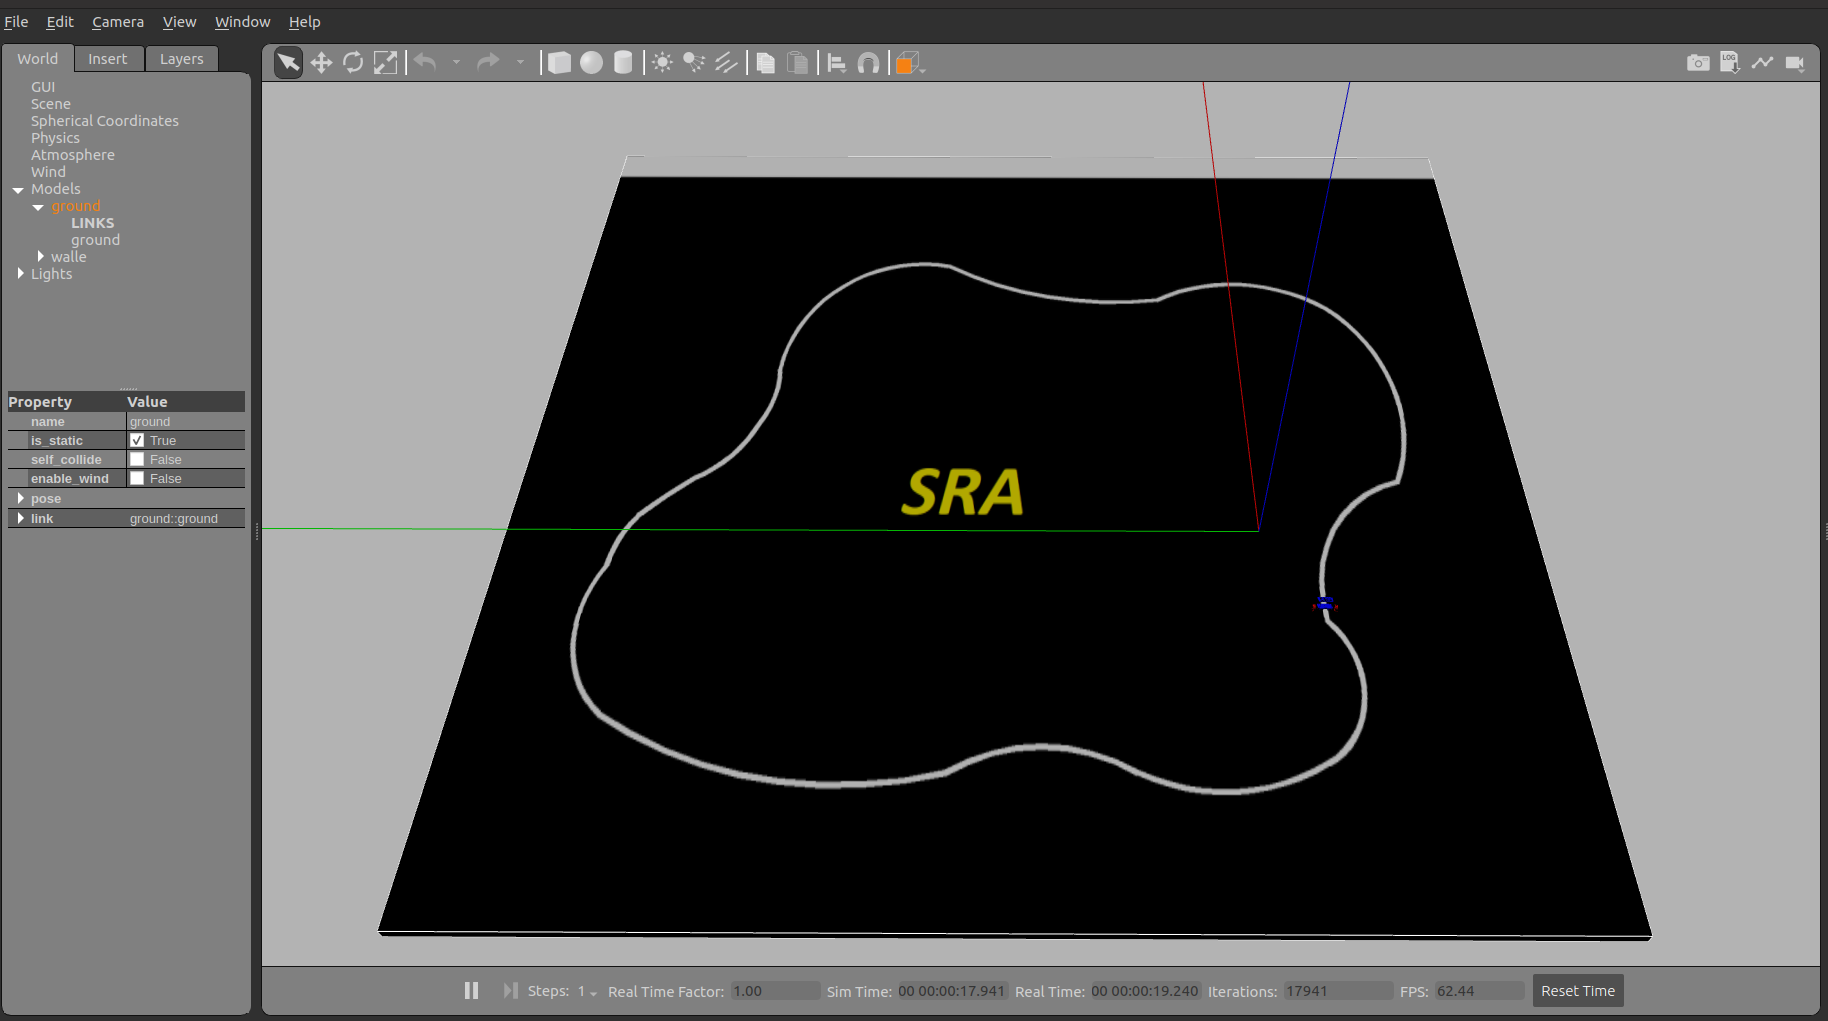
> In this blog, we will talk about world files in Gazebo, how to design a world through an image, why should you use an SDF file in ROS 2 as compared to an URDF file and ROS 2 launch files.
Author : Aryaman Shardul
Note : These instructions are for ROS 2 Foxy and Gazebo 11 and were tested on Ubuntu 20.4 LTS.
.world extension.
    <model name="ground">
    <pose>1 2.3 -.1 0 0 0</pose>
    <static>1</static>
    <link name="ground">
      <collision name="ground_coll">
        <geometry>
          <box>
            <size>10 10 .1</size>
          </box>
        </geometry>
        <surface>
          <contact>
            <ode/>
          </contact>
        </surface>
      </collision>
      <visual name="ground_vis">
        <geometry>
          <box>
            <size>10 10 .1</size>
          </box>
        </geometry>
        <material>
          <script>
            <uri>models/course.material</uri>
            <name>course</name>
          </script>
        </material>
      </visual>
    </link>
    </model>
As you can observe from the above code snippet, the file has the very basic elements of a world in Gazebo.
But the important thing to be noted is what is inside the script tag whose parent element is the material tag.
This script tag contains an URI(Uniform Resource Identifier) which links our world file to the 'course.material' file located in the 'models' folder of the src.
The contents of the models folder will describe the visual aspect of our world.
material course
{
receive_shadows on
technique
{
pass
{
ambient 0.5 0.5 0.5 1.0
texture_unit
{
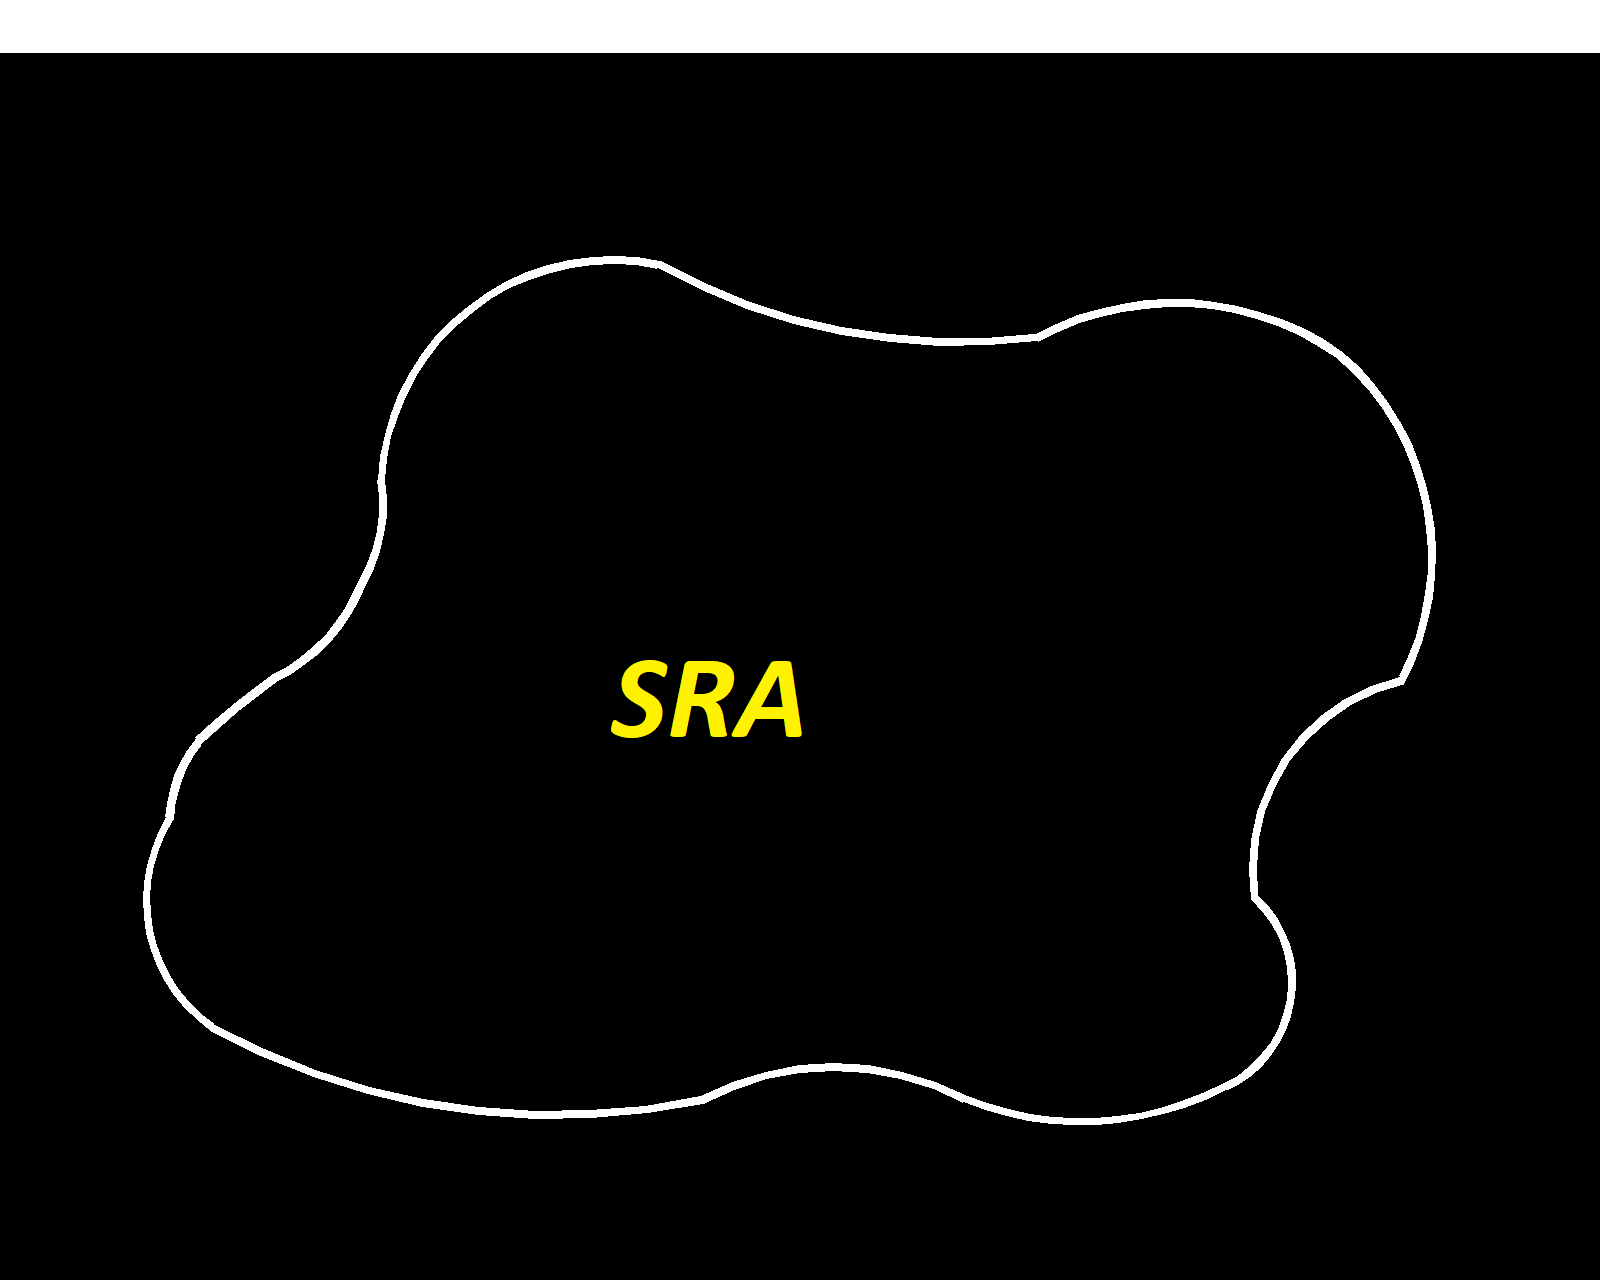
texture sra.png
}
}
}
}
This file's main job is to connect the world file in our worlds folder with the image of our world located in our models folder.
The name mentioned in the name tag of the script in the world file(here it's 'course') must match with the name on the first line after the word 'materials' in the course.material file.
Lastly, we must have an image of the design of our world in the models folder.
Note that this method is tried and test for images with '.png' and '.jpg' extensions.
      <sdf version='1.7'>
          <model name='walle'>
            <link name='base_link'>
              <inertial>
                <pose>-0 0 -0.0025 0 -0 0</pose>
                <mass>0.00680000</mass>
                <inertia>
                  <ixx>0.000121426</ixx>
                  <ixy>1.28749e-19</ixy>
                  <ixz>2.00583e-22</ixz>
                  <iyy>0.000118984</iyy>
                  <iyz>-4.40398e-24</iyz>
                  <izz>0.000240029</izz>
                </inertia>
              </inertial>
              <collision name='base_link_collision'>
                <pose>0 0 0 0 -0 0</pose>
                <geometry>
                  <mesh>
                    <scale>1 1 1</scale>
                    <uri>meshes/base_link.STL</uri>
                  </mesh>
                </geometry>
              </collision>
              <collision name='base_link_fixed_joint_lump__camera_link_collision_1'>
                <pose>0.058 0 -0.015 0 -0 0</pose>
                <geometry>
                  <box>
                    <size>0.007 0.007 0.007</size>
                  </box>
                </geometry>
                <surface>
                  <contact>
                    <ode/>
                  </contact>
                  <friction>
                    <ode/>
                  </friction>
                </surface>
              </collision>
SpawnEntity method let's the SDF library handle the URDF conversion. package:// but the sdf::readString method transforms the package:// urls into model:// so they can be resolved by Gazebo. gz sdf -p file_name.urdf > file_name.sdf. model://package_name from the uri and just keep the portion meshes/part_name.STL
          def generate_launch_description():
            model_path = GazeboRosPaths.get_paths()

            env = {
                "GAZEBO_MODEL_PATH": model_path,
            }

            sdf_prefix = get_package_share_directory("my_bot")
            sdf_file = os.path.join(sdf_prefix, "urdf", "walle.sdf")

            world_prefix = get_package_share_directory("my_bot")
            world_file = os.path.join(world_prefix, "worlds", "sra.world")

            rviz_config_prefix = get_package_share_directory("my_bot")
            rviz_config_path = os.path.join(rviz_config_prefix, 'rviz/urdf_config.rviz')
      return LaunchDescription(
        [
            ExecuteProcess(
                cmd=[
                    "gazebo",
                    "-s",
                    "libgazebo_ros_init.so",
                    "-s",
                    "libgazebo_ros_factory.so",
                     world_file,
                ],
                output="screen",
                additional_env=env,
            ),
            Node(
                package="gazebo_ros",
                node_executable="spawn_entity.py",
                arguments=[
                    "-entity",
                    "walle",
                    "-x",
                    "-1",
                    "-y",
                    "0",
                    "-z",
                    ".41",
                    "-b",
                    "-file",
                    sdf_file,
                ],
            ),
            Node(
                package="robot_state_publisher",
                node_executable="robot_state_publisher",
                output="screen",
                arguments=[sdf_file],
            ),
            Node(
            package='rviz2',
            executable='rviz2',
            name='rviz2',
            output="screen",
            arguments=[rviz_config_path],
    )
        ]
    )
I hope you all have learnt something new from this blog and I encourage you all to try and create your own worlds in Gazebo using this method and launch your robots and worlds by creating your own launch files. Here is the link to my github repository so that you can go through the code and try it for yourselves.